Introduction:
One of the key features of Pharmadex 2 is its ability to provide real-time tracking information to applicants. However, sometimes it may be useful to have this tracking information pushed out to applicants via email. In this article, we will discuss the steps required to set up email notifications in Pharmadex 2.
Pre-requisites:
Supervisor credentials in Pharmadex 2
Access to Pharmadex 2 installation on the server
Steps:
Create a Gmail user for the Pharmadex installation.
This user should be a dedicated Gmail account that is not associated with any individual or person but should be in control of admin/regulatory authority.
Assign this user to the Pharmadex installation by adding the following lines to the application.properties file:
spring.mail.username=emailaddresshere@gmail.com
spring.mail.password= lcuatdcubezkqdfg

- Go to security in your Google account settings
- Go to signing into Google
- Go to Apps password

• Go to select app
• Select Others from the dropdown
• Enter the URL of the OpenRIMS instance
• Password will be generated

- Copy the generated password.
*App passwords let you sign into your Google Account from apps on devices that don't support 2-Step Verification. You'll only need to enter it once, so you don't need to remember it.*
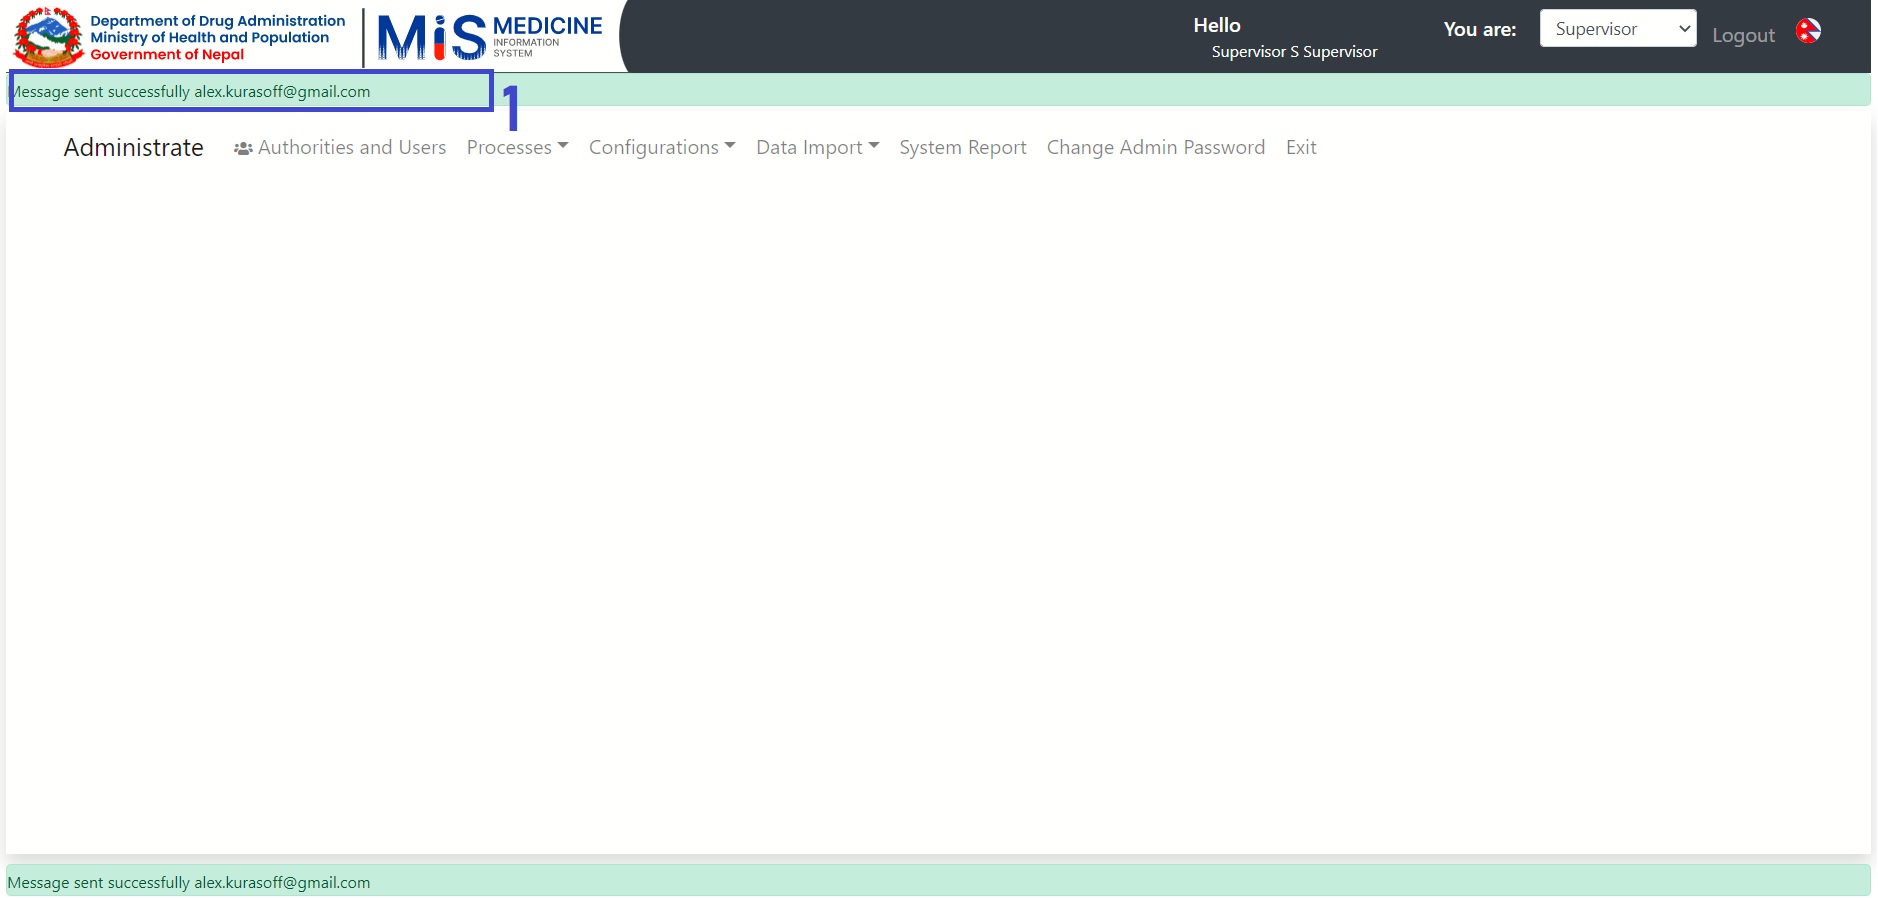
Test the email service by using the test email feature provided by Pharmadex 2 for supervisors. This feature sends a test email to the supervisor currently logged in.
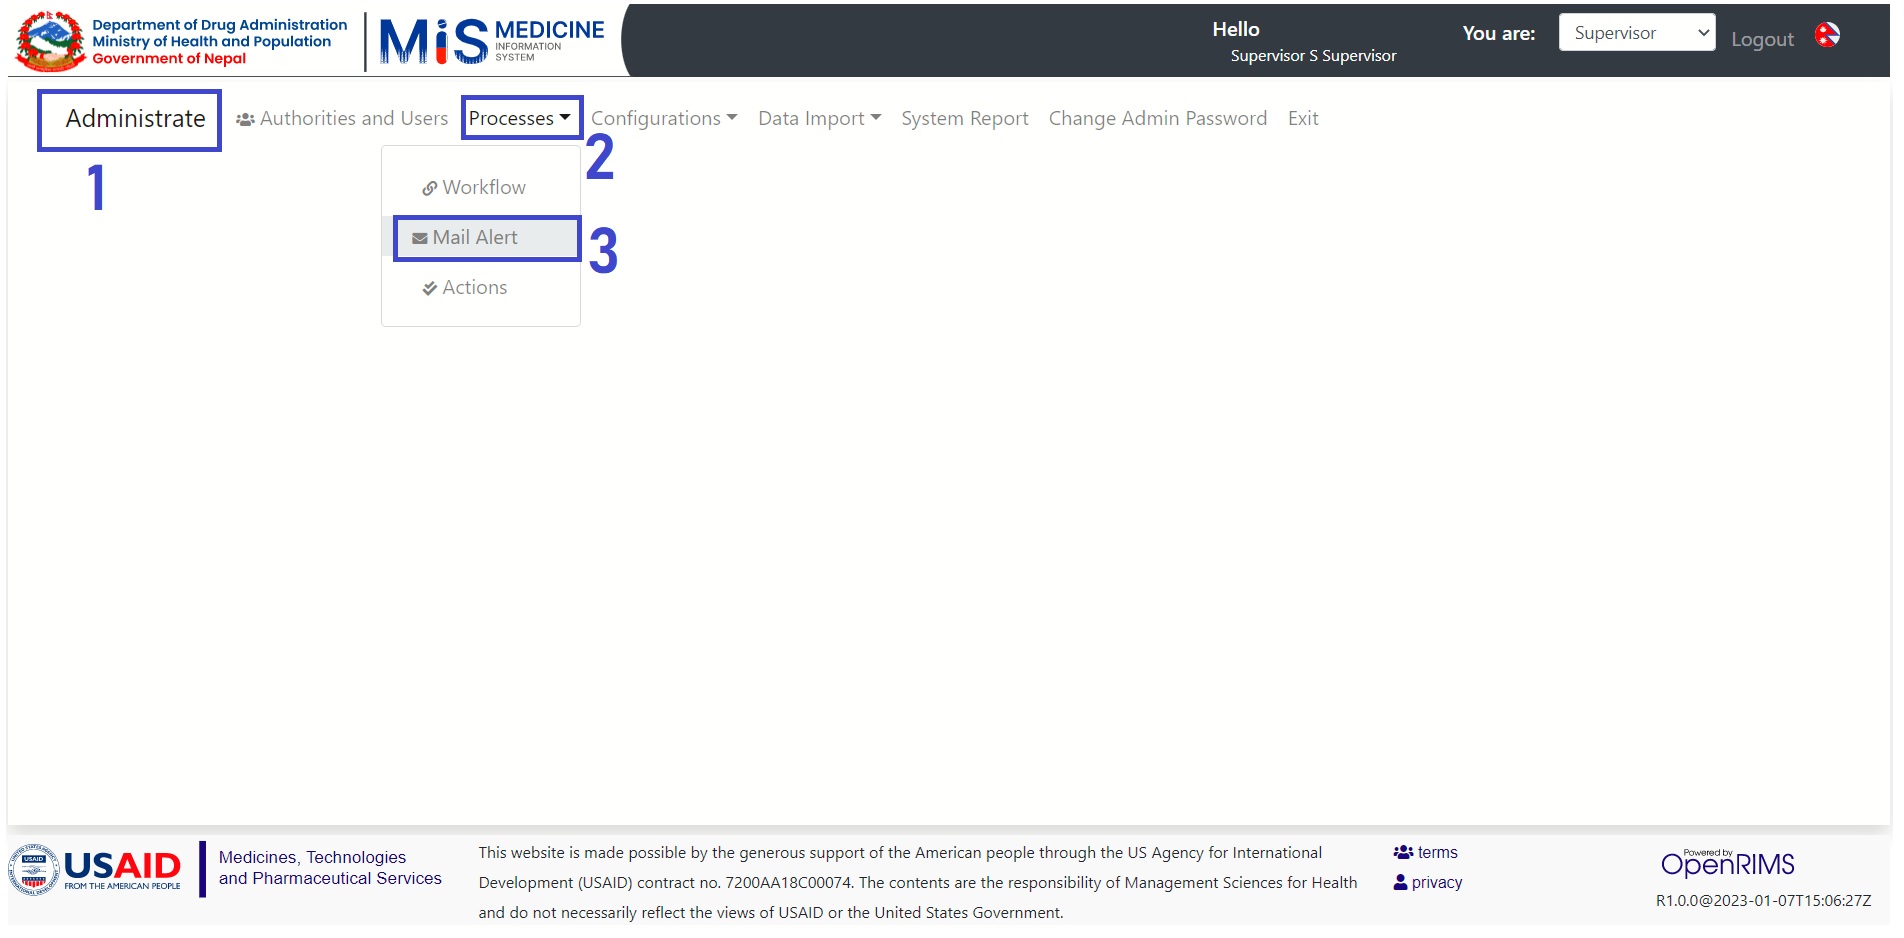
- Log in as Admin
- Go to Process
- Click on the test
- Success message of the mail test configuration
*It's also important to note that the application.properties file is located in the same folder as the Pharmadex binary.*

*In Linux, it will be found in the installation directory, while in Windows, it will be in the same directory as the Pharmadex executable.*
Set-up actions to trigger E-mail
Add calls to the email service to the workflow configurations, so that tracking information is pushed out to applicants after the completion of a specific workflow step.

- Go to Processes
- Select Workflow
- Select the type of workflow – processes from the list
- Select the stage workflow within the processes
In the selected processes within the workflow.

- Go to the Stage of the workflow where you want to set the trigger
- Set the feature ON/OFF in that stage
- Write the message to be in the body of the message
- Save the configuration